Showing posts with label our house. Show all posts

Tuesday, September 02, 2014

A Quick Before and After

I'm still alive.  Truly.  I am.
Just busy with life, and kids, and all the other fun stuff that comes along with that!

I keep getting emails from lovely people asking questions about my kitchen and other such things.
It's amazing to see that people are still stopping in to visit this blog!

From time to time I remember that I have a blog that I used to write regularly.
And from time to time I start to feel like I want to start posting stuff from our house again!

Maybe once school starts up again around here (school is NOT starting in our neck of the woods as the teachers are on strike!!) I'll have more time.  But how about a quick before and after...

After our lengthy kitchen renovation we took a much needed break from any renovation projects.  But a few months ago we finally decided to tackle the downstairs play room.  The goal was to make it look bright and fresh using only the things we had around the house.  In the end we ended spending a tiny bit of $$ on a couple sheets of plywood to add rustic looking planking to one of the walls, but other than that, everything (even the paint) was just sitting around the house waiting to be used!

So here's the before.

I took this picture before we got started on "operation makeover the play room".  This really was the play room in it's best "before" state.  You can actually see some of the floor in the picture.
Usually you could not.


After purging about half the kids crap toys we painted the room.  Caleb was super helpful.


We ended up adding wood planking to the one wall since the drywall was not in nice condition... after a few throw pillows and a gallery wall of a some mismatched frames from around the house the room was done.


(not the best quality photo-- I know.  But who has time for a real camera these days!!)

This room turned out to be one of my favourite rooms in the house-- and we spent next to nothing to change it up!

Oh, and now I want to paint the rest of the house white!  I know you all already think it's white-- but now I want WHITE white :)

Thursday, April 28, 2011

Light Show

Maybe you've noticed... maybe not... but when I take pictures around the house I try my best to make sure the light fixtures are not included in the photo.  Why?  Because we haven't gotten around to replacing any of the original light fixtures.  The original ones-- for the most part-- are pretty uninspiring.

However!  After cleaning out my closet a few weeks ago (and selling a bunch of old clothes on craigslist) I had $100 burning a hole in my pocket!  I decided it was time.  Time to put a light fixture in our room that I love.  And love it I do!!


Ummm... yeah, so I still don't have my camera... hence the iphone photos.
Aren't they pretty though?


Now... I know you're all wondering... what could possibly have been there before that was so offensive?
This.


I've said it before... sometimes aesthetics are more important to me than practicality.  A ceiling fan is a completely practical choice for a bedroom that gets stifling hot in the summer (all 6 weeks of it).  But what if that ceiling fan is NOT aesthetically pleasing and is NOT practical?  Unfortunately this fan is not only ugly to look it, it also doesn't work.  I've tried to use it during the hottest of hot days for the past 2 years but the fan just does not move any air in the room, and when it really starts to go fast it starts to shake and rattle like you wouldn't believe.  I used to lie awake in bed at night listening to it get all wound up fearing decapitation.  So, I am not sad to see the fan go.  for the 46 cold weeks of the year I will enjoy the beauty of my new light fixture, and for the remaining 6 hot weeks of the year I will sleep in my cool, quiet, decapitating fan-free basement guest room.

While I'm at it... why don't take you on a light fixture tour of the rest of the house?

First up, the hallway.  I've got a PAIR of these staring at me everyday.  So offensive.  So inappropriate.  Enough said.


Would you believe me if I told you that I've actually paid money... real money... for a light fixture that looks identical to this one in Caleb's room?  Doug and I had a light fixture like this one in the bedroom of a basement suite Doug and I rented a long time ago.  For some reason, when Doug makes the bed he likes to give the sheets a good snap when he shakes them into place.  One morning he snapped those sheets like never before and snapped the light fixture into two pieces.  So off we went to Home Depot for a replacement.  So sad.


This one's in the entryway of our house.  Doug and I have quite different feelings about this fixture.  When Doug looks at it he thinks "now there's a perfectly sensible light fixture that does an adequate job of lighting our entryway."  When I look at it I think, "now there is an unattractive fixture that looks like it it came straight from the torture chamber of a medieval castle."  I don't know why but it just gives me that vibe.  I don't think Doug's going to let me change it anytime soon.  Maybe if I find the most amazing light fixture for an amazing price... like $5.00... he'll go for it :)


And finally, the dining room.  I really have nothing against this one.  It's semi-attractive, it's does a great job of lighting the room... most people would like it.  I guess it just doesn't give me that feeling of WOW!  It's not a WOW kind of light fixture.  I want WOW when I sit in my dining room eating hot dogs as my kids throw food on the floor, gag, and then throw up their dinner.


What I really want is something like this from Restoration Hardware.  I think that the worst of dinners could be made better by a light fixture like this one.


Only problem is, I don't have an extra $500 in my budget for the RH light fixture.  Shocking... I know.  If anyone knows of a light fixture that looks like this but is a MAJOR deal, please let me know!  And if anyone would like the purchase any of my pre-existing light fixtures, please... let me know :)

But if you had your eye on the decapitating ceiling fan, your sadly out of luck.  It's already found a new home at the dump.

Thursday, March 31, 2011

Spring Cleaning: In the Closet

I have closet envy. I wish my closet was as neat and organized as Emerson's.  While I love my house, one of the downers is the fact that all of the closets are not very big.  The closet in our room is used only by me-- Doug prefers to fold and stash in a drawer rather than hang.  Even for just my clothes, the closet is bit on the small side.  And while I try my best to keep it neat and organized, it usually starts to looks like this.


I actually have a quite legitimate reason for having a messy closet-- I have a hard time reaching the folded items on the top shelf since only one of my arms is useful above shoulder height.  So whenever I want to put a stack of folded clothes up on the shelf I have to put each item up one at a time with my right hand.  This is annoying, yes.  But not as annoying as when I try to take items down from shelf.  Say I want a pair of jeans that are on the bottom of the stack.  I try my best to one-handedly wiggle it out from the pile but alas, the entire pile usually ends up falling on top of me and all over the floor.  How's that for annoying!!!  So over the past few weeks, I've been brainstorming ways to temporarily make my closet a bit more user friendly.  I say temporary, because at some point down the road Doug would like to build some custom shelves and drawers in here.  But for now, I've come up with this...


So, instead of precarious piles I stashed all of my folded items in these bins I picked up at Ikea.  They are $4.00 a piece and are meant for toy storage so they're really sturdy and have a nice wide ledge around the top.  I sorted and purged my clothes, then categorized the folded items and stashed them in the bins.  Now when I need a pair of jeans, I just reach up and grab the 'jeans' bin with my one arm, find the pair I want, and put it back on the shelf!  I'm giving myself a one-armed pat on the back right now as I write this :)


My next brilliant idea occurred when I spotted an extra set of cleats at the very top of the closet.  When we moved in there was only one shelf at the top of the closet... but extra cleats at the top meant that I could add another shelf!  A loooong time ago I told Doug about my findings and asked if we had any extra lengths of melamine shelving in the garage that could be used to construct an additional shelf.  He said that there were a few options.  Conversation finished and forgotten.  Fast forward a few months.  Doug is folding laundry while I'm watching TV one evening (bless his soul :)  He starts trying to put stuff away in my closet-- disaster zone.  All of a sudden, without saying a word Doug's running down the stairs to the garage.  I hear the saw.  2 minutes later he's running back up the stairs with a piece of shelving and puts it in place.  Problem solved.  It really was that easy.


So now I have an extra shelf to stash out of season clothing and stuff that doesn't fit (I hold onto jeans of every size-- just in case).  This set of drawers has been in my closet for some time now.  We picked it up at MCC for $10 a few years ago, gave it a coat of white paint, added some new hardware and now it gives me a bit more storage in my crazy small closet.

The green boxes were a last minute addition... I stole them from the office to stash a few accessories.


And then I got all crazy and decided that the hangers should all match.  So anything that wasn't white is now in the guest room closet downstairs.  It's all about the details people.


As you all know, I care about the price tag.  So how much did this mini-closet makeover cost?

$16.00 for the four white storage bins
$0 for the extra shelf (scrap material from the garage)
$0 for the green boxes (already had them)
$0 for the white hangers
I'm not counting the dresser since I've had it forever.

Grand total?  $16.00.
Minimizing my frustration level?  Priceless.

Sidenote:  After purging the closet of clothes I no longer wear yesterday, I put up a few items for sale on craigslist.  I've already made $70.  So this closet makeover was actually a money maker :)

Sidenote #2:  Maybe I should have sold my old stuff before commencing with this closet makeover.... I would have had more to work with....

Tuesday, March 08, 2011

The Stairs

Can you tell that I'm starting to run out of rooms to blog about?


Our entryway is probably my least favorite room of the house... because it's so incredibly tiny.  Picture Doug and I struggling to enter the house with the kids, our bags and Emerson's carseat while trying to kick off wet boots, shrug off jackets, and not bump into each other.  Meanwhile, Caleb has found the light switch for our exterior lights and is flicking them on, off, on, off.... sending an SOS message to the entire neighborhood... the Toews family is home!  Much frustration has been expressed during these episodes, as can be imagined.  But, even though our entryway is not great from a practical standpoint, it does LOOK better nowadays thanks to a much needed makeover.

Here are some of the before pictures...

Wow.  Now there's an ugly room.


The carpet on the stairs had seen better days.  During the pre-renovation days we let Caleb run around in his boots... and apparently nothing else.  It was a hot day.


Today, the entryway looks much better .  We started by painting and ripping the nasty carpet off the stairs.  Then we couldn't decide what to put back onto the stairs.  We debated between hardwood and carpet for several months... meanwhile had bare plywood for stairs.  That was a dream come true with a 2 year old just learning to walk up and down stairs on his own.  Finally, we opted to go for the carpet... even though I'm not really a fan.  In the end it's the safest option for kids... and it was a kind of nice to hire someone to finish the stairs rather than do it ourselves for a change!  We also added style and rail wall panelling to the stairs and entryway to give the room a bit more interest.  Here's the one side of the stairs...


And the other side.


Laying tile on the landing would have probably been the most durable option, but we had a couple of extra boxes of laminate so we decided to just go with it.  I put down a pretty large seagrass mat by the door and it's protected the floor really well.  When it came time to pick the color of carpet for the stairs, I decided to go for a color that picked up the same natural looking tones of the seagrass mat instead of matching the grey-ish tones of the paint color (the color above the panelling)... and I love the end result.  I envisioned sand at the beach when I picked the color... and it turned out great!

And let me just give a big thank you to Caleb for straightening/organizing the shoes for me.  It's one of his "jobs" at our house... and for some reason it's one of his favorites :)


Last year I picked up these hooks and had Doug hang them up for me in the entryway.  Having a place to hang our coats (even though it's not all that big) has made a huge difference.  We only keep the jackets and footwear that we use on a daily basis by the door... everything else is stashed in a basement closet.


I don't know about you, but I can't wait for summer.  I am so ready to say goodbye to jackets and hello to flip flops!  And I think my entryway feels the same...

Friday, March 04, 2011

I've Got Pink on the Brain

I've been on the hunt for deals lately... specifically pink deals!  As you may recall, we renovated Emerson's room before we knew that she was going to be a she.  I decided to paint the room a beautiful blue-- I still LOVE the blue in there.  It obviously would have worked for a boy's room, but the blue is pretty enough that it looks great for a girl too.  But, I've had pink on the brain lately.   It's probably because pink is quickly becoming a trendy color to decorate with-- it's in the magazines, on the internet, in the stores... and I'm starting to like it.  I've never really been a pink girl.  When I was a kid my Mom painted my room pink-- I covered it in hockey posters-- true story... so I probably wouldn't opt to paint an entire room pink.  But I think it looks fabulous as a accent color.  So over the past few weeks I've been shopping for pink.... here's what I've found!


I may have also bought pink hand towels for my bathroom... :)

Operation "pink-ify" Emerson's room is now underway.  I've got some work to do-- as usual, I have a hard time buying and leaving things "as is"-- it's probably because I can never find exactly what I'm looking for... at a reasonable price (when I say reasonable I mean dirt cheap).  So I've got some sewing, framing, spray painting, and DIY-ing ahead of me this weekend.  Hope this little lady likes it!


As I was looking at this picture of Emerson, I saw this picture of Caleb as a baby.  I usually don't think that Emerson looks like Caleb did as a baby, but this picture is starting to make me think differently...


What a pretty baby boy he was... he's sure gonna love me for that comment one day...

Have a good weekend everyone!

Wednesday, January 26, 2011

Now we're looking better...


The work in the office is officially done!  Over the weekend we moved all of our junk back in.  These bookcases are quite the upgrade from what we had in here before!  (see here)  I've spent the last few afternoons in the office staring at the bookcases, moving things around-- basically trying to make our not so attractive books and office stuff look as pretty as possible.  After a bit of shuffling and re-organizing (and hiding the really ugly books and picture albums) it looks alright.


The bead board wainscoting is painted and makes that crazy half-wall looks 10 times better than it did before.


Now let's get up close and personal with those bookcases.

As you can see, Billy got a bit of an upgrade.


The ugliest books of all have been stashed in the baskets.  Sometimes I wonder why I don't get rid of those old, ugly, outdated, and for the most part useless textbooks.  When I say useless-- I mean today and also 10 years ago.  But then I remember how much money I spent on those crazy books.  That's why they're still on the shelf.


As you can see here, we put three of the Ikea Billy bookcases together and then trimmed them all out in MDF strips cut to size.  Once it was all sanded and painted it looked like one unit-- not three.


And the bead board on the back instead of the cardboard panels looks so much better.  Gotta love the cardboard tri-fold...  good try Ikea.  Good try.


Doug had to customize the last bookcase so that it would fit around the bumped out wall.  He also made a few adjustments that allow us to hide our router and wireless modem on one of the shelves-- I think that's what they're called.  I really have no idea what they do-- all I know is that I'm not supposed to touch them.  What I do know is that I hate the way the look (all those cords and flashing lights drive me crazy) so I'm currently hiding them behind the picture until I can think of a better solution.


And on the other side of the room is my desk!  Finally, it's back where it belongs.  Let me take a minute to tell you about my great deal of a desk (because that's what us ladies like to do-- find great deals and tell everyone we know about them).  I found it in Pier One a couple of years ago-- regularly $699-- but the floor model was on sale for $150.  Why?  Because the drawer front was cracked.  I showed it to Doug, he assured me that it was fixable, so we brought it home!  All it took was a bit of glue, a couple of clamps, and one of those stain pens and the desk looks as good as new.


I have an entire blank wall that needs some sort of artwork.  I have no idea what I'll do with it yet.  In the meantime, I framed one of Caleb's paintings in a frame I found in the clearance bin at Home Sense.  I actually think it looks pretty great.


The far wall also needs some help as you can see.  And I'm on the hunt for the perfect area rug.  That closet is also crying out for an organizational makeover.  Doug, please build me some custom shelves like you did here!


And the window also need some help.  I'm currently working on some curtains that might work-- the built out half wall might make the floor length drapes look funny... if they don't work in the office I'm sure they'll work on some other window.


So, in summary:

Bookcases look good.
I have ugly textbooks.
My desk was cheap.
Caleb in an aspiring artist. At least him Mom thinks so.
Area rug needed.
Too much wall-- not enough art.
Please Doug, help the closet!!
And curtains, what to do...

Thursday, January 13, 2011

Our Current Project

I think this is the first time I've done a post on an in-progress project!  I guess it's because I've been playing catch up for the last few months.  Well, Doug and I decided to tackle the office.  Our office is located downstairs-- it's the first downstairs room we've tackled.  This project has got to be one of the longest most drawn out project we've ever attempted.  We tore the office apart after Emerson was born and once Doug was back at work, but with two kids and busy schedules-- things tend to move a little slower.  But finally, the office is in its last stages!  I thought I'd share it with you all.

Like most people, we have lots of books and stuff that needs a spot (boxes in storage doesn't count!)  So, we decided to put in some custom bookcases.  Here they are-- in the priming/filling/sanding stages.


We put in new laminate (had a few extra boxes leftover from the upstairs reno) and installed new mouldings.


There is this awful bumped out half wall along two sides of the office that are terribly uneven.  To disguise the fact that it is really out of square we decided to cover it in bead board and cap it off with a built out ledge.  I think it's going to look awesome once it's all painted.  The half wall no longer sticks out like a sore thumb!


Here's the "before" shot.  Please excuse the blurry picture quality-- I can't blame this terrible picture on Caleb, I totally took this one myself.  The green isn't a bad color-- it just made the room feel pretty dark.  As you can see, the shelving situation has received a bit of an upgrade. 


Let me tell you,  I am SO anxious to finish up in this room so that I can move all my files back in and get organized.  The state of our files are pretty embarrassing-- especially coming from someone who once was in charge of coming up with a system of converting a entire university's paper admission files into electronic files.  Every time I have to find some sort of document I am absolutely horrified at how disorganized things are downstairs.  Once this office is done-- I will be putting an end to the chaos!

Wanna know a secret?  The built in bookcases are actually from Ikea!  I've seen people convert Ikea's Billy bookcases into built in custom-looking shelves in magazines and online-- so we thought we'd save ourselves some work and give it a try.  


They received a bit of an upgrade-- bead board on the back instead of the flimsy cardboard Ikea sells you with the bookcases, we built up the base, added a substantial header and crown moulding, the one exposed end gable received a customized panel, and we trimmed out all the joints to make it look like one unit, not three.  The jury is still out as to whether or not this was a better option than building the shelves ourselves...

Once the priming and painting is finished, I'll show you how it looks!

Monday, January 10, 2011

Two for One - The Kitchen & Dining Room


And now for the ugly pictures.

Where do I begin?  I think I'll just let the "before" pictures speak for themselves.


There's the dining room.  Wow.  Help needed.


Last fall we lived like this from October through till' Christmas.  I cooked with the stove in the middle of the kitchen for the first half of that time period.  Once the stove was back in its spot the new dishwasher (not yet hooked up) took its place in the centre of the kitchen for several weeks.

Wow, so glad I was at work during this time-- I would have gone absolutely crazy if I was at home all day in this mess.  Instead I had to come home to this at the end of a long day of work and try to cook dinner (then clean it up)-- it only drove me partially insane-- not completely crazy.  At least the shop vac came in handy for cleaning up Caleb's meal time spills.


Here's the dining room-- in progress.  The flooring is in... finishing is still to come (as you can see from the opening leading into the dining room).  Poor little Caleb.  I didn't like eating breakfast in that crazy room either.


As I've mentioned before in a previous post, my kitchen has not really been renovated-- it's received more of a minor (cheap!) facelift with paint and new curtains.  The flooring and baseboards were replaced in these two rooms (along with the rest of the main floor of our house)-- but other than that, it's just paint and a few new accessories in this kitchen!

Here's the dining room now.


It's really a pretty basic room-- just some new curtains, artwork on the wall and our table and chairs!  Oh, and this beautiful bowl.  Thank you Ikea.


Wish I could have showed you the "before" picture of the carpet in here before Doug ripped it out.  You probably wouldn't want to see it.  Kids and carpet in dining rooms DO NOT go together.


These chairs are remarkably comfortable.  The selling feature for us was the fact that they're stackable!  If you knew how many times Doug and I have moved since we've been married you'd understand how excited were were about this.  Our table is getting pretty beat up-- I'm hoping Doug will make me a new one.  Someday.


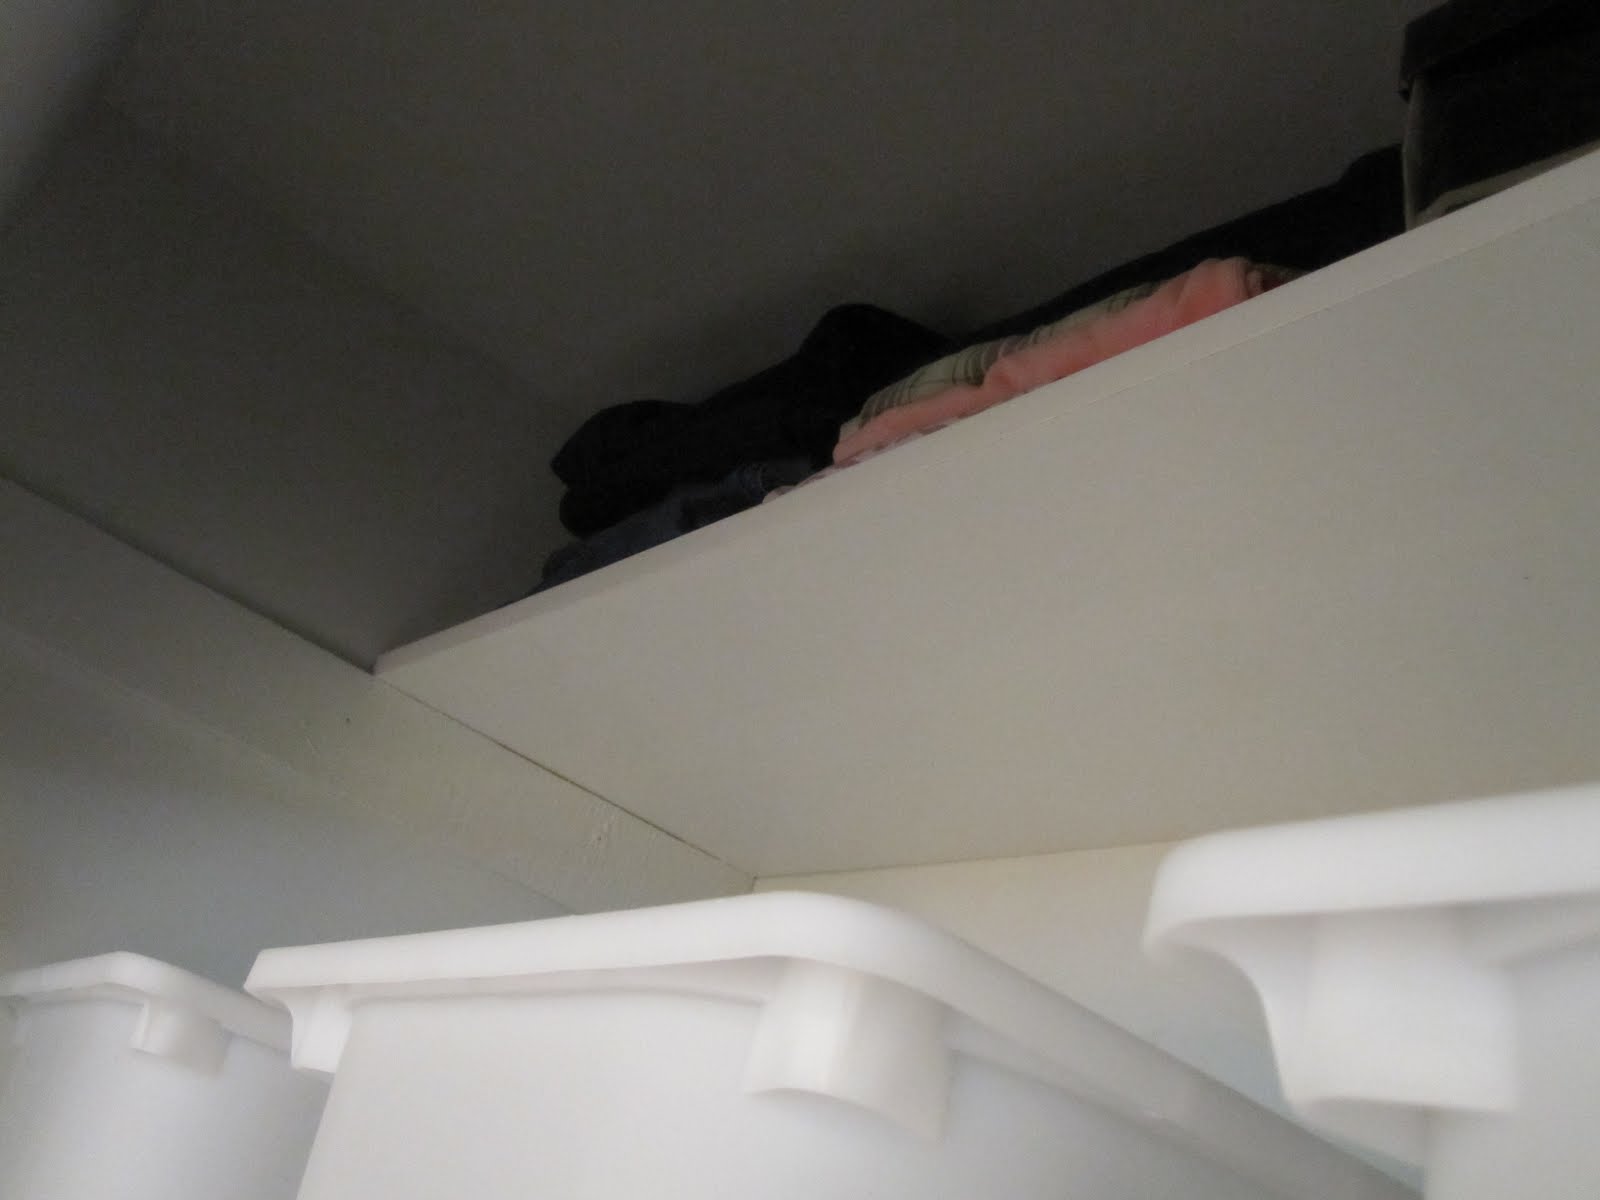
And, here's the kitchen.  It definitely still needs major work.  We're planning to rip out the bulkhead, replace/resurface the cabinets and put in a new countertop.  When?  Who knows.  But let me tell you-- my cabinet building husband has plans.
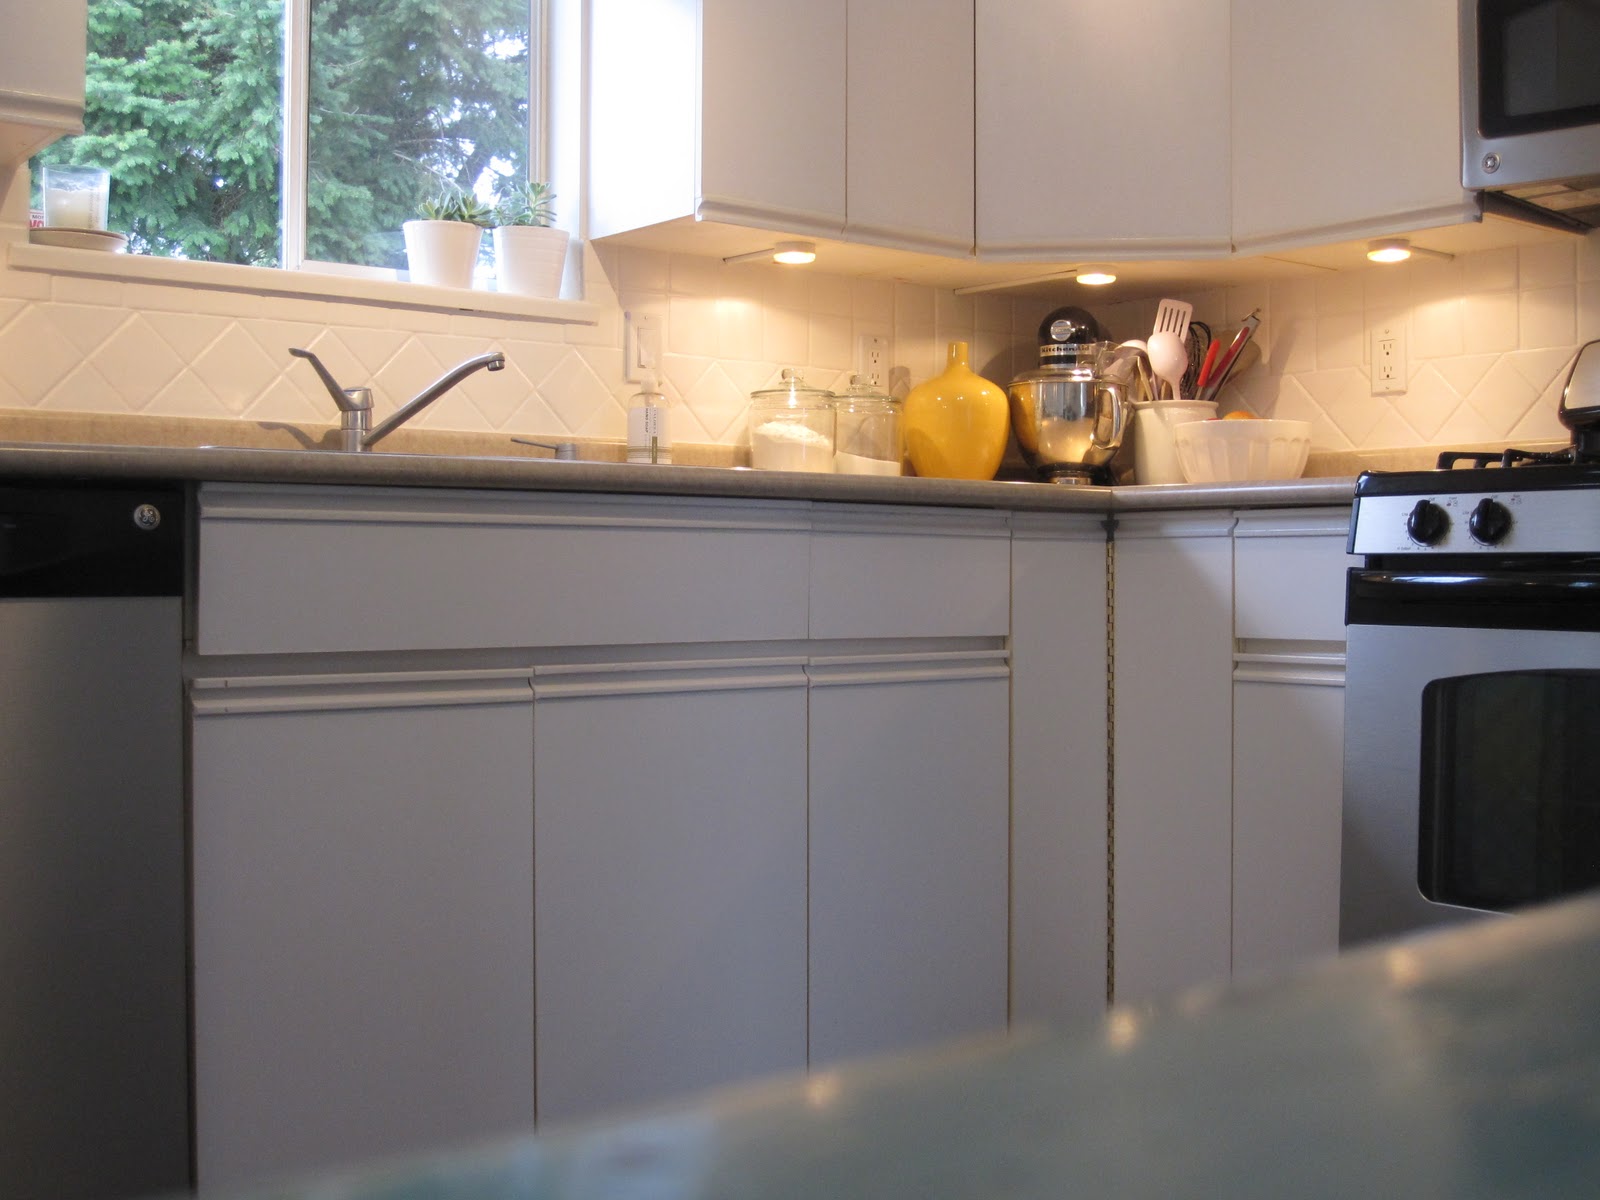

Here's one side...


And the other side!


The first thing I did was paint out the oak trim on the doors and drawers.
It probably only took me an hour to do, but it made a huge difference.


The next thing I did was paint out the multicolored tile backsplash.  I learnt this trick from my Mom.  When I was a kid we moved into a tiny (and ugly) temporary house while we were building our new one.  The kitchen and bathroom were covered in ugly tile straight from the 70's.  We sanded, primed, and painted it all out in white and it looked fantastic.  I did the same in my kitchen.  The key is to use an oil based paint since you want it to stand up against all kinds of abuse.  My backsplash paint job is now 2 years old and it still looks great.


The kitchen did have one great thing going on when we moved in-- under cabinet lighting!  Love it.


And here are a few other details.

This desk I found at MCC for a mere $15 bucks.  It's beat up, distressed, and blue-- I love it.  It gives me a bit of extra storage in this kitchen and it's a great place to store/hide the paperwork and junk that seems to collect in kitchens.  Plus it has a built in cubby for diaper bags.  One day this wall will be pantry cupboards, until then, the blue desk will do.


We put up these shelves above the desk-- these ikea shelves were left in the dining room by the previous owners.  They were the beech color-- so I painted them, picked up the Ikea brackets for extra support and had Doug mount them on the wall.


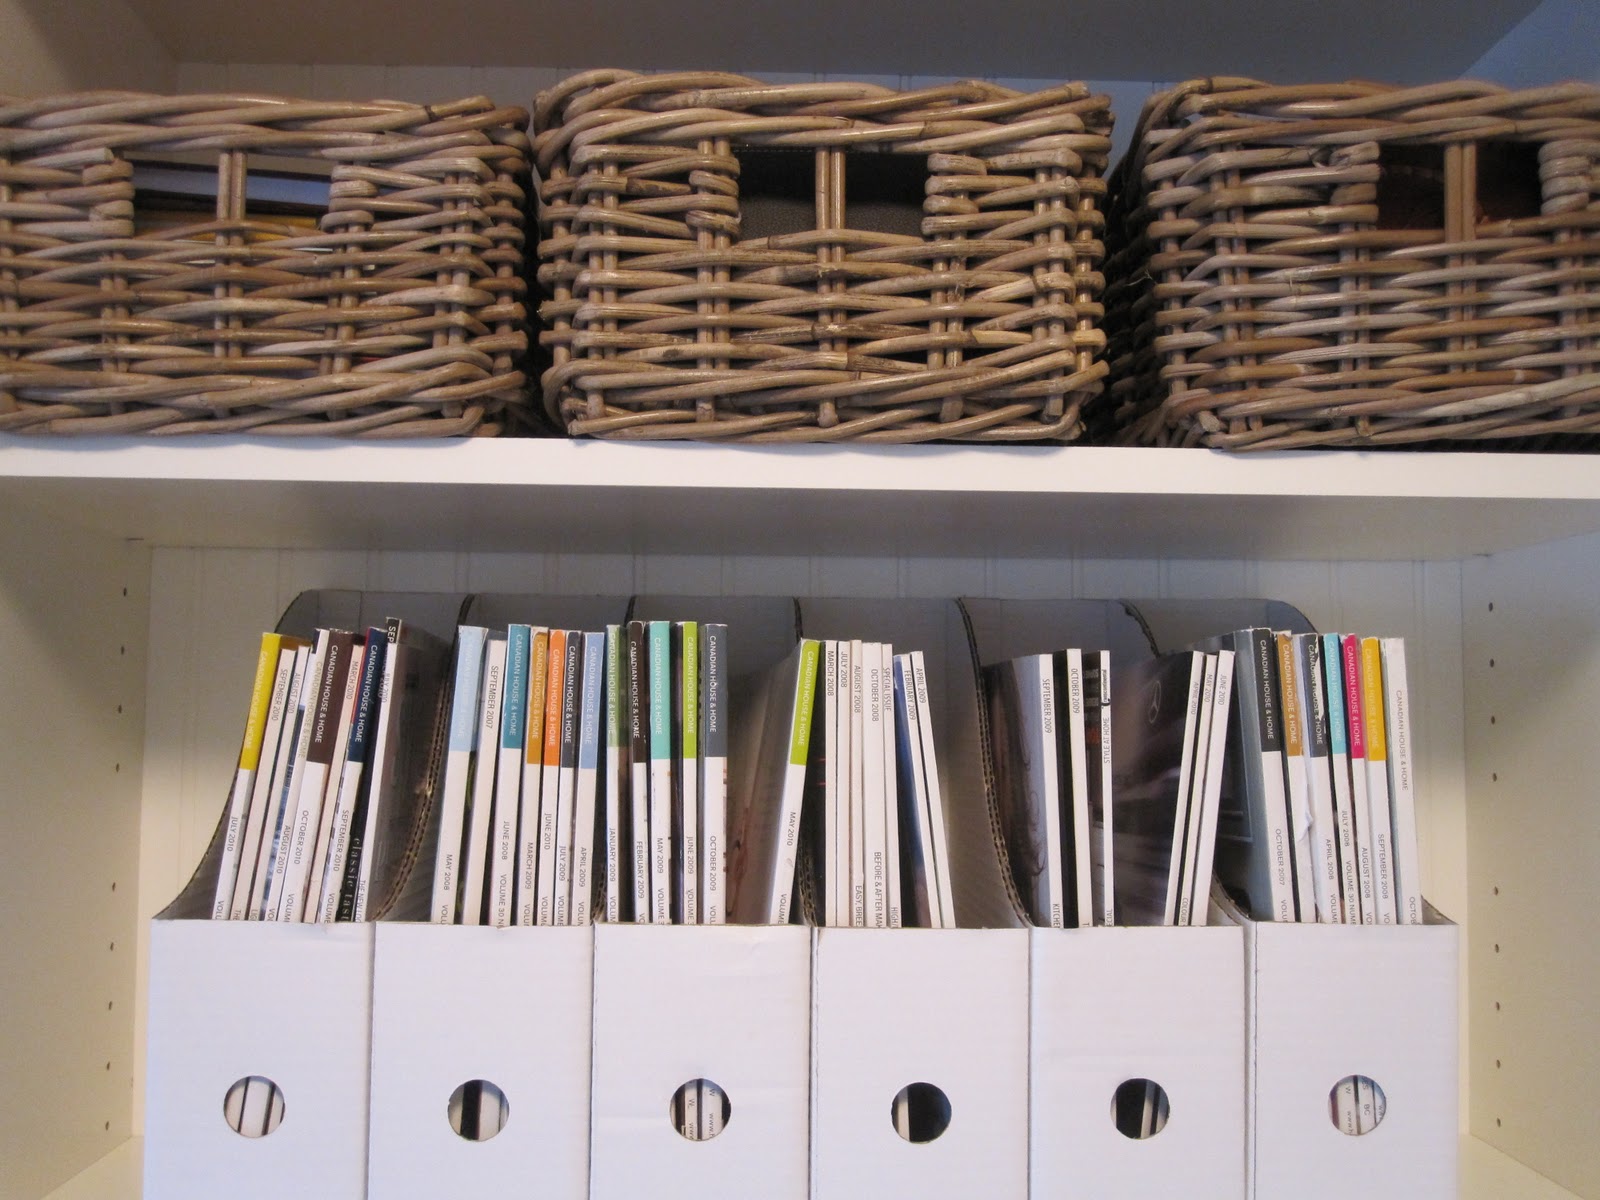
Other cheap accessories-- cookbooks, and a picture I took in Montreal a few years ago.  Oh look-- there's Santa :)  Caleb played with Santa (the eraser) for half and hour this morning.  In a house full of new toys he chooses the Santa eraser.  Go figure.


More free art.  A friend of mine picked up a bunch of old antique picture frames for a project she's working on in her house.  This picture was in one of the frames-- she was going to get  rid of it... so I snagged it :)  It looks cute in my kitchen.


Other kitchen accessories-- kids with bed head and pajamas.  
Caleb was my picture-taking assistant this morning (when he wasn't playing with Santa eraser).


There's even a table for all those bed head/pajama kids in my kitchen.


After painting everything in white-- the room needed a bit of color.  So, I made some cute little roman shades for the two windows.  They were so cheap and so easy to make.  All it took was 2 yards of fabric for both (1 yard per curtain-- you can order it here) some broad cloth to line the back, a bit of velcro and some scraps of wood stolen from the garage.  I also made one for the bathroom (see here).


And that's the kitchen.  Time to grab my coffee and relax for a bit while the kids are still napping :)