Showing posts with label kitchen. Show all posts

Friday, August 30, 2013

why I love thrift stores...

That little seascape picture had me at hello when I was
browsing at a local thrift store a while back.


I love that it's unique and adds personality to my kitchen... and it was $4... how can you not
love that price tag!!


Happy long weekend everyone!

Tuesday, June 04, 2013

Kitchen Reveal

Alright.  Let's talk about my kitchen.

Like I mentioned a few days ago, my kitchen is finally finally done!  And it only took a year and a half.  But the end result is totally worth it, right??


Just to remind you of what it looked like before-- here's what my kitchen looked like when we first moved into this house.  It had a lot of bright colours going on, but was still dark and dreary.  It felt cramped, small, a tad depressing, and really didn't work for me :)


Fast forward 4 years, and here's what it looks like today.  When I walk into my kitchen I can hardly believe it's the same room.  Here's what it looks like now (when it's clean).


Now let's get into some of the details.

This was NOT a "go big or go home" kind of kitchen... but it also wasn't an extreme budget kitchen.  We had one major, MAJOR factor working in our favour-- my husband builds and designs custom kitchens for a living.  So... when it comes to the cabinetry, we got the best cabinetry possible and only paid for the materials since Doug was able to build it all with his own two hands.  But even though we were able to get the cabinetry we wanted for a great deal, we still were very conscious of our budget.  Here's a quick break down of the saves vs. the splurges in this kitchen:

SAVE:

kept existing appliances
kept existing layout-- for the most part
ikea faucet
inexpensive backsplash tile choice
used reclaimed wood for shelves
bought inexpensive knobs for cabinet doors
did ALL the work ourselves.  ALL.

SPLURGE:

quartz countertops (BUT, were still a bit of a save... as you'll soon find out!!)
expensive (and beautiful) bin pulls on all drawers
Closed up an existing window and made another one taller
Removed bulkhead

Okay.  So that was the summary.  Here are the details.

To save money, we didn't remove the wall that separates the kitchen from the living room.  People renovating with a similar floor plan typically do this, but it would have required considerably more time and cash-- two things we sure don't have a lot of these days!!  I still wanted that space to feel unique, so we added some open shelves between the upper cabinets to display some pretty stuff and tiled all the way up to the ceiling.  The lower cabinets are the same depth as the upper cabinets which keeps the room feeling spacious but still gives us added storage and counter space.


This next area of the kitchen required the most amount of work.  When we moved in there used to be a floor to ceiling window right where those open shelves are located.  While I loved all the natural light the window gave, the kitchen really really needed more counter space and more room for drawers!  Previously I had 3 really teeny tiny drawers-- now I have these 6 big ones plus three more on the other side of the sink.  And I can't tell you how much of a difference the extra three feet of counter space makes when I'm working in the kitchen with all my little "helpers".  It really makes this room so much more functional.

  
While this spot of the kitchen is definitely more functional, I also wanted it to be pretty.  Isn't that what we all want?  A kitchen that's both functional and pretty??  So... bring on more open shelves!  My kitchen is a very white-- and I love it-- but to keep it from feeling too cold and clinical I added some natural wood.  These natural wood shelves turned out to be my absolute most favourite part of the kitchen.  They turned out way better than I ever thought they would.  They were also a money saving solution-- the wood was free as it was just sitting around the shop taking up space and we didn't have to pay to have them sprayed like other finished parts.


These shelves hold all of my everyday dishes and glassware.  It's the perfect spot-- I unload my dishwasher right up onto those shelves-- no opening cabinet doors and moving things around-- everything gets stacked right up on these shelves and is used every, every day.


I've had a lot of people email asking about our countertops.  Even though I love marble, I knew that it could be a risky choice for my kitchen since we cook and live in this room all day long.  So, I decided to go for quartz since it's a much more durable option.  I was going to go with Misty Carrera by Caesarstone, but in the 11th hour I discovered that the countertop company we were going to work with sold a generic brand of quartz that had a colour that I liked even better than Caesarstone's Misty Carrera.  The spots and colour variation is more subtle than the Misty Carrera and is a tad less "grey".  And the best part was it was 40% cheaper than the Caesarstone option.  Pretty much a no brainer if you as me!


Others have asked about our cabinetry hardware.  The bin pulls on all of the drawers are from Restoration Hardware and were a splurge.  To save a bit of money I ordered knobs in the same finish (polished nickel) from an online supplier that were considerably cheaper than the matching ones from RH.  And, I really really love them.

Our faucet was a major save-- Ikea.  $79.  And I was like... WHAT!!?  Seriously.  It has the look I wanted and for $79??  Again, a total no brainer if you ask me!  I love the handles-- they have a vintage vibe that I totally love.


And the backsplash.  We saved money using a standard 3x6 white subway tile from Home Depot.  Even though our backsplash tile choice was cheap, it's still a classic look and I really love the way it looks all the way up to to the ceiling behind the open shelves, and around the kitchen window.  I also really love the light grey grout we selected.  It is subtle, but really makes the tile a feature in the kitchen.


Next week I'll do a special post listing the sources.   I bet you can't wait!!  If anyone has a specific question they want answered leave one in the comments or feel free to email me directly.


To conclude, I'm just going to brag about my hubby for a minute.  Doug designed/built/installed this kitchen with his own two hands.  ALL OF IT.  I knew he was good at what he does-- but even I was amazed at how GOOD he is at building kitchens... and how GOOD he is at all the little details that most people miss and don't notice.  I could explain my vision to him knowing that he would and could create exactly what I dreamed up.  Every little detail is perfect.  Exceptional.  Every day I walk into my kitchen and I can't believe Doug made it.  What would I do without him!!


So, if you live in the lower mainland and are looking for a cabinetry guy-- I know a really really good one!!  Shoot me an email if you want some info.

And, that concludes the long awaited (almost thought it was never going to end) kitchen renovation.  I love it.  Hope you do too :)

ps:  sorry 'bout the amateur photos-- still learning!
pps:  don't you just love how those pink peonies made it into almost every shot??
ppps:  pink peonies are my absolute favourite flower.  And a bundle for $5?  Score.
pppps:  wish I could have each and every one of you over for an awesome party so we could enjoy this kitchen for reals!!

Tuesday, August 28, 2012

Oh Hello There

I've been MIA-- I know... but trust me when I say that I may have been missing... but definitely not lacking in the action department.  Things have been busy around here as we wrap up our summer.  Wish I could have kept you all in the loop, but alas... our computer decided to die on us.  But... after a week and a half in the shop... it's back and better than ever!

I'll try to fill you in on all the details another time... since it is kinda late right now... but let me share a highlight... THE DOORS ARE UP IN MY KITCHEN!!!


Late one night, Doug worked overtime to put the doors and drawers on... and let me tell you... it feels fantastic.  We're still waiting for the rest of the finished parts-- crown, kick, decorative end panels, the open shelves-- and I need to get the rest of the hardware, but in the meantime, I've kinda been enjoying the fact that the doors are hard to open.  After months of the kids having open access to everything... they can't figure out how to open a darn thing :)  Sweet mercy... I may NEVER buy cabinet hardware for the rest of this kitchen!!

Today I started operation organization in the kitchen... I shuffled things around and really unpacked all my kitchen stuff the way I want it.


My spices are right at home in their own drawer-- and for the first time ever-- I have a tupperware drawer!  No longer will I be digging around in the hall closet for a matching container and lid-- it's all there, organized, and ready for action.  I can't begin to tell you how exciting that is...

Anyhow... I'll be back soon.  In the meantime, I'm going to keep organizing... and dealing with little Miss Attitude...


Goodness gracious.  Who knew "two" was going to be this much fun??

Friday, April 13, 2012

Open Shelves in the Kitchen

No real progress in the kitchen over the past week-- although Doug did find a scrap piece of melamine to use as a makeshift countertop on the new cabinets he built.  If we have some time this weekend the plan is to get the upper cabinets for this wall built and installed.  Once that's done I'm going to transfer all the stuff from the uppers on the other side of the kitchen over to this side and the demo will begin!


I have always loved the look of open shelves in the kitchen... and I'm sure getting a taste of it in my own house these days!  As much as I love them-- open shelves on the bottom half of the kitchen can be a challenge with a toddler... you can only imagine the kind of destruction Eme can accomplish in just a few short seconds!  I just saw this picture on pinterest and had to laugh... while it's beautiful... I am QUITE certain that toddlers DO NOT live in this house...


I'm hoping to have some open shelves in my kitchen-- but NOT in a place that is in any way accessible to children.  That's gotta be the ultimate make-work project.

In the meantime-- anything that could be broken or potentially be dangerous to kids will not be stored on the lower shelves in my kitchen.  It's going to be an interesting few months living like this... I can guarantee that it's not gonna always look pretty...


Sidenote... I found more of my favorite wire baskets on sale at Superstore the other day!  knowing that I was going to be living in a kitchen with a whole lot of open shelves I bought six-- at $3.50 a piece-- that's a deal I couldn't pass up...

And one more new thing in the kitchen... I've been displaying my keepsake from our Italy trip on those open shelves...


On every major street corner in Italy there is someone selling tourist-y paintings-- some of them were nice-- but I kept thinking that most of them were a little cheesy.  When were were in Florence I found this fantastic hole-in-the-wall shop that sold the most beautiful antique prints-- some that were hundreds of years old.  I fell in love with so many prints-- but ended up buying this little engraving.  It's of the Florentine countryside-- done in 1827.  It came with the mat and fit perfectly into my laptop case-- and it looks good in my house :)  No cheesy paintings of the Coliseum for me!

Anyways... there's a little update on the status of the kitchen reno for you.  Have a good weekend everyone!

Monday, January 10, 2011

Two for One - The Kitchen & Dining Room


And now for the ugly pictures.

Where do I begin?  I think I'll just let the "before" pictures speak for themselves.


There's the dining room.  Wow.  Help needed.


Last fall we lived like this from October through till' Christmas.  I cooked with the stove in the middle of the kitchen for the first half of that time period.  Once the stove was back in its spot the new dishwasher (not yet hooked up) took its place in the centre of the kitchen for several weeks.

Wow, so glad I was at work during this time-- I would have gone absolutely crazy if I was at home all day in this mess.  Instead I had to come home to this at the end of a long day of work and try to cook dinner (then clean it up)-- it only drove me partially insane-- not completely crazy.  At least the shop vac came in handy for cleaning up Caleb's meal time spills.


Here's the dining room-- in progress.  The flooring is in... finishing is still to come (as you can see from the opening leading into the dining room).  Poor little Caleb.  I didn't like eating breakfast in that crazy room either.


As I've mentioned before in a previous post, my kitchen has not really been renovated-- it's received more of a minor (cheap!) facelift with paint and new curtains.  The flooring and baseboards were replaced in these two rooms (along with the rest of the main floor of our house)-- but other than that, it's just paint and a few new accessories in this kitchen!

Here's the dining room now.


It's really a pretty basic room-- just some new curtains, artwork on the wall and our table and chairs!  Oh, and this beautiful bowl.  Thank you Ikea.


Wish I could have showed you the "before" picture of the carpet in here before Doug ripped it out.  You probably wouldn't want to see it.  Kids and carpet in dining rooms DO NOT go together.


These chairs are remarkably comfortable.  The selling feature for us was the fact that they're stackable!  If you knew how many times Doug and I have moved since we've been married you'd understand how excited were were about this.  Our table is getting pretty beat up-- I'm hoping Doug will make me a new one.  Someday.


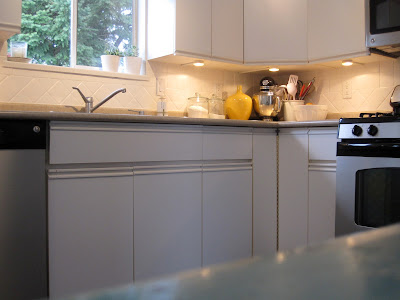
And, here's the kitchen.  It definitely still needs major work.  We're planning to rip out the bulkhead, replace/resurface the cabinets and put in a new countertop.  When?  Who knows.  But let me tell you-- my cabinet building husband has plans.


Here's one side...


And the other side!


The first thing I did was paint out the oak trim on the doors and drawers.
It probably only took me an hour to do, but it made a huge difference.


The next thing I did was paint out the multicolored tile backsplash.  I learnt this trick from my Mom.  When I was a kid we moved into a tiny (and ugly) temporary house while we were building our new one.  The kitchen and bathroom were covered in ugly tile straight from the 70's.  We sanded, primed, and painted it all out in white and it looked fantastic.  I did the same in my kitchen.  The key is to use an oil based paint since you want it to stand up against all kinds of abuse.  My backsplash paint job is now 2 years old and it still looks great.


The kitchen did have one great thing going on when we moved in-- under cabinet lighting!  Love it.


And here are a few other details.

This desk I found at MCC for a mere $15 bucks.  It's beat up, distressed, and blue-- I love it.  It gives me a bit of extra storage in this kitchen and it's a great place to store/hide the paperwork and junk that seems to collect in kitchens.  Plus it has a built in cubby for diaper bags.  One day this wall will be pantry cupboards, until then, the blue desk will do.


We put up these shelves above the desk-- these ikea shelves were left in the dining room by the previous owners.  They were the beech color-- so I painted them, picked up the Ikea brackets for extra support and had Doug mount them on the wall.


Other cheap accessories-- cookbooks, and a picture I took in Montreal a few years ago.  Oh look-- there's Santa :)  Caleb played with Santa (the eraser) for half and hour this morning.  In a house full of new toys he chooses the Santa eraser.  Go figure.


More free art.  A friend of mine picked up a bunch of old antique picture frames for a project she's working on in her house.  This picture was in one of the frames-- she was going to get  rid of it... so I snagged it :)  It looks cute in my kitchen.


Other kitchen accessories-- kids with bed head and pajamas.  
Caleb was my picture-taking assistant this morning (when he wasn't playing with Santa eraser).


There's even a table for all those bed head/pajama kids in my kitchen.


After painting everything in white-- the room needed a bit of color.  So, I made some cute little roman shades for the two windows.  They were so cheap and so easy to make.  All it took was 2 yards of fabric for both (1 yard per curtain-- you can order it here) some broad cloth to line the back, a bit of velcro and some scraps of wood stolen from the garage.  I also made one for the bathroom (see here).


And that's the kitchen.  Time to grab my coffee and relax for a bit while the kids are still napping :)