Monday, February 28, 2011

And a great weekend was had by all...

My parents were visiting us this weekend!  They left this morning... boo.  As I was putting Caleb down for his nap he said that he wished Nana and Papa could stay forever.  I told him that all the sheep on Papa's farm would miss him too much... that answer seemed to make sense to him.  We all enjoyed a great weekend together.  Here are two of my highlights.

Number One.  My Mom made doughnuts.  The are THE BEST homemade doughnuts in the entire world.  Can I get an amen from anyone that was in my high school class?  Growing up, my Mom would often spend the morning making doughnuts while we were all in school.  At lunchtime she would deliver my siblings and I each a plate of warm, fresh doughnuts to share with our friends... oh the memories.


Mom started mixing them up Friday morning-- and my Dad and I hit the road in search of a doughnut cutter.  Apparently they no longer exist.  We went to Micheals, Bed Bath and Beyond, Canadian Tire, Superstore, Safeway, Walmart... nothing.  There were a few more stores we could have tried, but it was already time to roll them out so we had to get creative with stuff we had at home.  Wow were they good.


Highlight Number Two.  Even though it was an absolute miserable day in Vancouver (rain, snow, wind, below freezing temperatures) we decided to explore the downtown via public transit.  It was a cold adventure, but we had fun.  Caleb was particularly excited about the whole experience.  We begun the day by hopping on the sky train in Surrey and rode it as far as it would take us.


Emerson had her first experience in the stroller without the carseat... she did great.  Taking the kids along can be complicated, but it was nice to have a couple extra hands to help!


Yup, it was a cold one.


Next, we decided to take the SeaBus across to the North Shore.  Here's the view from the water.


Emerson stayed nice and warm in her snow suit.


Once we made it back to the Waterfront Station, we hit the train again and then decided to take the bus down to Granville Street.  Why to Granville Street?  To shop at Restoration Hardware and Pottery Barn... of course.  My Mom was looking forward to this one.  Caleb was quite excited to find a chair his size at Restoration Hardware... but he was even more excited about his happy meal toy.  That's a good thing, considering that the chair was 300 times more expensive than the happy meal.


Next up, Pottery Barn.  I didn't purchase anything... but I did snap a picture of this gorgeous gallery wall.  I would love to recreate that in my own house... but maybe on a budget :)


Doug, my Dad, and the kids were troopers...  I think it helped that the store was warm, and that there was plenty of comfortable seating.


Then it was time to head home.  The bus pulled up to the bus station and I got on with Emerson.  The doors closed and the bus took off.... and I realized that no one else had made it on.  It was just the two of us.  No phone, no wallet... just Emerson and a soother.  I decided to get off at the next stop and wait for the rest of my family to catch up.  While sitting at the bus stop I had an interesting chat with a talkative lady about gardening.... and, well... unicorns.  Can't say that I had much to contribute to the unicorn topic.  But about 10 minutes later the next bus pulled up and the rest of the gang was there.  The bus was REALLY full, but I managed to elbow my way on.  Poor Caleb was a little bit concerned.  It was pretty cute.  After a long day out and about in the cold, we got on the sky train once again to go home.

The whole day, Caleb proudly told everyone that he didn't have to sleep that day... no nap for him.  As far as he's concerned, he went the whole day without sleeping.


But sometimes pictures tell a different story.

Thursday, February 24, 2011

Found

Found my camera.  So apparently the person to blame is me... It was "hiding" in the drawer it's supposed to be in.  I looked in that drawer at least 5 times over the past week but couldn't see it.  Oh well.

But I am happy to report that progress has been made where the chair's concerned!  I stayed up late one night and managed to get the deck and front nosing of the chair on-- Doug was a great assistant.  Yesterday my Aunt who happens to be an upholstery pro stopped by to teach me how to tuft the inside back of the chair.  It's finally coming together...

Tuesday, February 22, 2011

Tough Decision...

Just when you thought I couldn't possibly come up with another fabric related post...

Ever since I purchased the chair I've been searching for inspiration... specifically fabric inspiration.  I thought it would be easy to pick something, but I've come to the conclusion that I like it all...

Since I don't have a camera or new pictures to share at the moment, I figured I could show you what I found while I was doing my "research".

A solid color is the logical choice-- trying to upholster something with a really specific pattern (like stripes) would be a nightmare the first time around.

First I found this gem... the style (at least as far as I can see) is almost identical to the chair I have.  The color is great... but velvet could be a bit finicky to work with.


Next up... chairs in a pale grey.  It's not an "in your face" color, but a chair this color could transition into just about any room of my house... and all you have to do is change out the throw pillow and you have a brand new look.  Things like that make me excited :)


I'm also loving the greige... the nailhead detail is beautiful on this chair.  But in my house... I'm not so sure if it would work.


But, then I was thinking... the right pattern... a busy pattern... wouldn't be that difficult.  I found this beauty-- I love it.  It would look so great in a little girl's bedroom.  I also found the fabric, but alas, it was out of my budget.


I also like the trellis fabric, and hey, that throw pillow looks familiar :)  But it could be a bit of a difficult pattern to work with.  Maybe another time.


I follow Sarah Richardson on facebook.  I "liked" her page and now I get all of her status updates.  I pretend we're friends.  I tell Doug all about her life.  He nods and pretends he's listening.  A couple of days ago she put this picture up on her page... how awesome is this pink little number?  As soon as I saw it I wanted a chair like it for Emerson's room.  But really, who am I kidding-- f I had a chair like this I'd put it in my room (if Doug would let me... or if he suddenly became color blind).  But alas, where would one find fabric like this?  And even if I did find it, could I afford it?  Big no on that one.


So, after doing my homework, I finally made my decision.  I decided to play it safe and went with this light grey cotton twill from Fabric.com.  For just over $10 a yard, you really can't go wrong.  I figured that if I royally screw up this chair, it won't be a total disaster since the fabric was so cheap.  So I placed my order and 2.5 days later the fabric was delivered right to my door (I love fabric.com).


It's not too wild and it's not too crazy, but I think it's going to be easy to work with for a newbie like me.

So now I'm curious.... which one would you choose?

Images from:
1/2/3/4/5

Monday, February 21, 2011

Missing In Action

I didn't post my weekly (for the most part) photo of Emerson yesterday.

Sorry.

I know you're all disappointed, especially my Dad who may or may not refresh my blog every half hour to see if it's been updated.

It hasn't been an intentional break.  I had a lot of free time on my hands over the weekend and I would have put up a post or two, but my camera disappeared a couple of days ago.

I'm not usually one to misplace things... so it's really a total mystery as to where it could be.

Now I'm not gonna name names or point any fingers, but I am pretty sure someone in this house decided to use my camera and may have accidently hidden it.  Again, I said I'm not trying to blame anyone here.


I have a sneaking suspicion that someone else is using my camera... because pictures like these randomly appear on my camera from time to time.


I know I'm not the greatest photographer, but the pictures I take usually turn out better than this.


And as much as I appreciate Emerson's glow worm, I wouldn't normally consider it picture worthy.


And as much as I love my vacuum cleaner... again, probably not picture worthy in my books.


I'm fairly certain the camera is still in the house... somewhere.  
I will find it... eventually.

Until then, my posts could be a bit interesting... or maybe not.

Thursday, February 17, 2011

Just because she's too cute...


Change of heart.  It really is too cute not to post... so please ignore the crazy parental laughter and focus on my child please.  Mom and Dad, this one's for you!

Jumping Bean

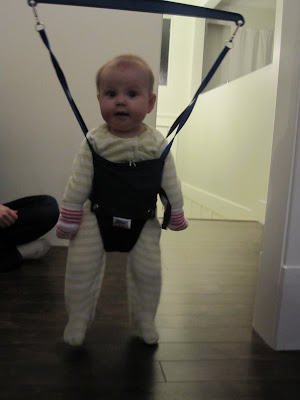
Emerson is a jolly jumper rookie... not that you'd be able to tell last night.  In an effort to keep her happy and occupied for the last hour before bed, Doug and I decided to put her in the jolly jumper for the first time and let her go for it.  She totally rocked it.  There was very little hanging... and a lot of jumping.

The moment we let Emerson go, her little legs sprung into action and with this stoic, serious expression on her face she bounced away...


She soon realized how much fun bouncing can be.  For the next 20 minutes she jumped and squealed... jumped and squealed.  Doug and I were like first time parents all over again, laughing, clapping, making funny faces, taking way too many pictures and video clips.  It was the best part of my day.  I opted to not put the video clip up on the blog because I sound like a total idiot shouting in the background: "Hello free time!!!"


And in case you're wondering... those are socks on her hands (no they are not arm leg warmers inspired by this week's Glee episode).  Emerson loves to scratch her face and it's making her face break out into the most terrible rashes.  So, she now wears socks on her hands all day long-- instead of clawing at her face she sucks on her sock covered hands.  Who knows... maybe she's going to inspire a new trend... socks on the hands.


And just for comparison's sake-- click here to see Caleb's first experience in the jolly jumper.  Caleb, I think your sister's got you beat...

Tuesday, February 15, 2011

Changing the world one throw pillow at a time...

Today I helped this little guy's Mama make a couple of new throw pillows for her place.  They look amazing, and I think he agrees.


My friend ordered the fabric from Tonic Living-- it's Fantastico, Azure, and the colors are amazing.  We managed to get two square 19 x 19 pillow covers (to fit Ikea pillow forms) out of one yard-- after a minor cutting mishap :)  They make my downstairs couch look so great, that I almost wish they were mine...

Monday, February 14, 2011

Review Time

This week I took a bit of a break from blogging... for no reason in particular.  It just happened.  So, Here's a recap of the week.

I made these delicious sugar cookies.  I'm not really much of a baker.  The cookies I make are usually average.  But these were exceptional-- I made this recipe.  If you want soft, delicious sugar cookies-- make these ones.  You won't regret it.


I also made these delightful ginger snaps.  Again, delicious... I surprised myself.  To be completely honest, I ate these cookies for breakfast several days in row.  Ginger snaps and coffee-- breakfast of champions.  I wasn't too sure if Caleb would like them, but he was definitely a fan.  The recipe was from here (it's a great blog, you should read it).  I highly recommend that you bake these cookies and eat them for breakfast-- while reading her blog, of course.


I made up a few more blankets.  This time around they were boy blankets.  Caleb saw some motorcycle flannel the last time we were at Fabricland and decided that he needed a blanket too.  I decided to let him help me sew it up.  About 10 seconds into him "helping" I regretted the decision.  So I pulled out his scissors, gave him some scraps, and let him cut till' his heart was content.  He then got to sit on my lap and watch the machine sew.  Only once did he attempt to stick his finger under the moving needle.


The chair is still in progress.  Doug spent some time working on it for me this weekend.  The legs needed refinishing, so Doug moved it into the garage, stripped off the old lacquer, did some sanding, and is now re-staining them.  Happy Valentines Day to me!


Emerson got her first taste of real food rice cereal.  She hated it.  Her face broke out into hives.  A couple of days later I tried oat cereal... more hives.  So I decided to give it some time and try again next week (she'll officially be six months then).   Any one have any suggestions?


I also decided to makes some baby food in preparation for the next weeks and months!  At approximately 9 pm on Saturday night I pulled everything out and started chopping, steaming, pureeing, and straining.  I then realized that I didn't have any ice cube trays to freeze the baby food-- so Doug went on a late night ice cube tray scavenger hunt all over town.  By 11 pm we had apple, pear, yam, and carrot baby food ready for the freezer!


And that was the week!

Sunday, February 13, 2011

Hey Big Girl

Unlike her brother, Emerson is getting a little bit too big for her britches.
It was a two person job to get these skinny jeans in place this morning... but it was sooooo worth it!


Does she mind?  Doesn't look like it :)

Sunday, February 06, 2011

DIY: Fixed Roman Shade

Alrighty folks... you asked for it, a tutorial on how to make your own fixed roman shade.  This may not be the right way to make them... but this is how I make them.  When I say "fixed"-- I mean that it cannot be raised up or down, opened or closed-- it's only function is to look pretty.  I had some extra black and white fabric (it's from here) kicking around my place and a free afternoon, so I decided to whip one up for the downstairs bathroom.

Here's what you need:
  • Fabric of your choice for the front of the shade (aka-- pretty fabric)-- the amount of material needed depends on the size of your window-- a yard per shade was more than enough for mine.
  • Fabric to line the curtain-- drapery lining works marvelously, and it's cheap ($3.00 a meter)
  • velcro-- 1" wide-- I buy mine by the meter at Fabricland
  • 2 lengths of 1/4" wooden dowels cut to that are cut slightly smaller than the width of your window
  • 1 1x2 cut to the width of your window (used to mount the shade to the inside of your window)
  • A couple of wood screws 
  • Staples and a staple gun


Here's how to make it:

Step 1:  Measure the width of your window (most important measurement to get accurate!) and come up with a general measurement of how long you want the shade to be-- this will depend on how tall your windows are.  My shades take up approximately 1/3 of the window.

Step 2:  Cutting time.  Cut a rectangle that is as wide as your window and add 1 1/2" per side as a seam allowance (if you're using a solid fabric you can just add 3", but if you're working with a pattern, you'll want to center your rectangle on the part of the pattern you want to highlight and then add 1 1/2" on either side.  I don't use a specific formula for figuring out the length (it will depend on how you want your folds to look) so I just give it as much length as possible-- usually the full width of the material (usually around 54")  I generally have 12-16" left at the end.  Next cut the piece of drapery lining for the back of your roman shade.  Cut it the exact width of your window-- I cut mine 27" since my window is 27" wide.  It's rocket science I tell you...

Step 3:  Pull out your iron-- AKA your BFF (when you're sewing, that is).  Using your measuring tape as a guide, fold over 1/2" on either side of your fabric and iron it down.  Then lay your lining onto the wrong side of your material and fold either side over 1" on either side so that the sides of your fabric cover the edges of your lining.  Iron and pin it down so that it's not going anywhere.  Re-measure at several points along the length of your panel to make sure it is EXACTLY the right size.  Use a metal tape measure for this-- it works better.  If the shade is too small, it's going to look funny and if it's too big, it's not going to fit.  Now is the time to make sure you have it right.  Then, stitch down either side of the panel making sure that you are stitching through the lining-- this secures the lining to the pretty fabric and gives you a nice finished hem all in one step.

It will look something like this...  (well it should)


Step 4:  Velcro!  I use velcro to secure my roman shades to the windows.  This makes them easy to pull them off if you need to wash or replace them.  Here's what to do.  Fold over the top of your panel about 1/2" to 3/4" and iron it down.  Then fold over again 1 1/2" and iron again.  Then take the loop side (soft side) of your velcro, cut the piece to fit, and pin it onto the part you've just folded over.  Then stitch along either side of the velcro you've just pinned on.  Quick tip, I pin the velcro closer to the bottom folded edge rather than the top, so that when I stitch along the bottom I have a better chance of catching the folded edge tucked under the velcro in my seam.  Here are a couple of pictures:

Fold over once...


Fold over twice.  Don't forget to iron!!


Pin on the loop side (it's the soft side) of your velcro.


Once it's stitched along either side, it will look something like this from the front.


Step 5:  Make the folds.  Like I mentioned before, I like to have my shades take up the top third of my window.  I make the top fold (or pleat) the longest-- on this shade it was approximately 10".  Pin it.  Pin it good.


Step 6:  Tack it.  I've opted to tack my folds together on my shades.  Once the fold is pinned together, I tack it together about 2" up from the bottom of the fold every few inches along the width of the shade. This holds the fold together nicely, and it's more subtle than straight stitching all the way across.

I have no idea what this is actually called-- but I call it a tack stitch.  Basically-- I set my machine up to do a wide zig zag stitch and then set the length to zero.  Instead of sewing a seam, my machine sews the same stitch over and over again in place.  It looks something like this.


Step 7:  Sew a hidden pocket for the first length of dowelling.  To help the shade hold it's shape, I hide a piece of dowelling at the top and at the bottom.  The first piece of dowelling has it's own hidden pocket to keep it in place.  Once the first fold is tacked into place, I flip the shade over and then pin right sides together to create a pocket for the dowelling.  Sew together with a straight stitch-- make sure the pocket is wide enough to fit the dowelling.


Step 8:  Create the rest of your folds.  I made the next two folds 2" long (2" from the bottom of the previous fold to the bottom of the fold you are now creating).  Just pin and tack them in place like the first one.  For these folds I've tacked them just underneath the previous fold so that the stitches are hidden.


Step 9:  Hem the bottom.  Once you've figured out how much of a hem you would like to see at the bottom of your shade, pin it in place.  Straight stitch across the bottom.


Step 10:  Create pocket for the second piece of dowelling.  Once the bottom seam is in place, flip the shade over.  Cut off the excess material leaving a 1 1/2" allowance.  Turn over the edge 1/2", press, and pin.  Then straight stitch across.  This will finish the edge and a create a hidden pocket for the second piece of dowelling.  Putting a piece of dowelling at the bottom gives the shade weight-- this allows it hang nicely and keep its shape.


Step 11:  Install.  Mount a piece of 1x2 (cut the width of your window) to the top of your window frame with screws.  Staple the hook side of the velcro (scratchy side) to the wood.  (I get Doug to do this part for me :)


And finally... attach the shade!!  ('m waiting for Doug to put up the wood/velcro piece in the downstairs bathroom, so I put up the finished product in my upstairs bathroom to take a quick picture)


Clear as mud?

Happy sewing everyone!  If anyone decides to attempt this project, please send me a picture!  I would love to see what you all create!